Home Blog

What Does It Mean When Bamboo Flowers and Dies?

0

1. Bamboo Is Monocarpic

This means that each individual plant only flowers once in its lifetime — then it dies.

  • Unlike annuals that flower and seed every year, or perennials that do so every season, bamboo grows vegetatively for decades.
  • Then, at a certain genetically predetermined age, it flowers, produces seed (if at all), and then the entire plant dies — stems, leaves, and roots.

🧬 Clonal Propagation and the “Same Generation” Issue

Most ornamental bamboo, including black bamboo, is propagated vegetatively, meaning:

  • New plants are made from cuttings, rhizome divisions, or tissue culture.
  • These are genetically identical clones — the same plant, in effect, just spread around the world.

So when we say “this generation will flower and die”, we’re referring to a genetic clone group — plants that all descend from the same parent.

  • If the original genetic line reaches flowering age, all its clones around the world may flower at the same time, even if they’re continents apart.
  • That’s why gardeners in different countries can suddenly report black bamboo flowering at the same time — they’re part of the same genetic lineage.

🕰️ Why Does This Happen?

The timing is encoded in the plant’s DNA.

  • Each species (or even each clone) has a biological “clock”, often 60–120 years long.
  • When the clock runs out, the plant initiates flowering, regardless of external conditions.
  • This behavior is called gregarious flowering: entire populations flower and die off simultaneously.

⚠️ What to Expect When It Happens

When black bamboo flowers, gardeners might notice:

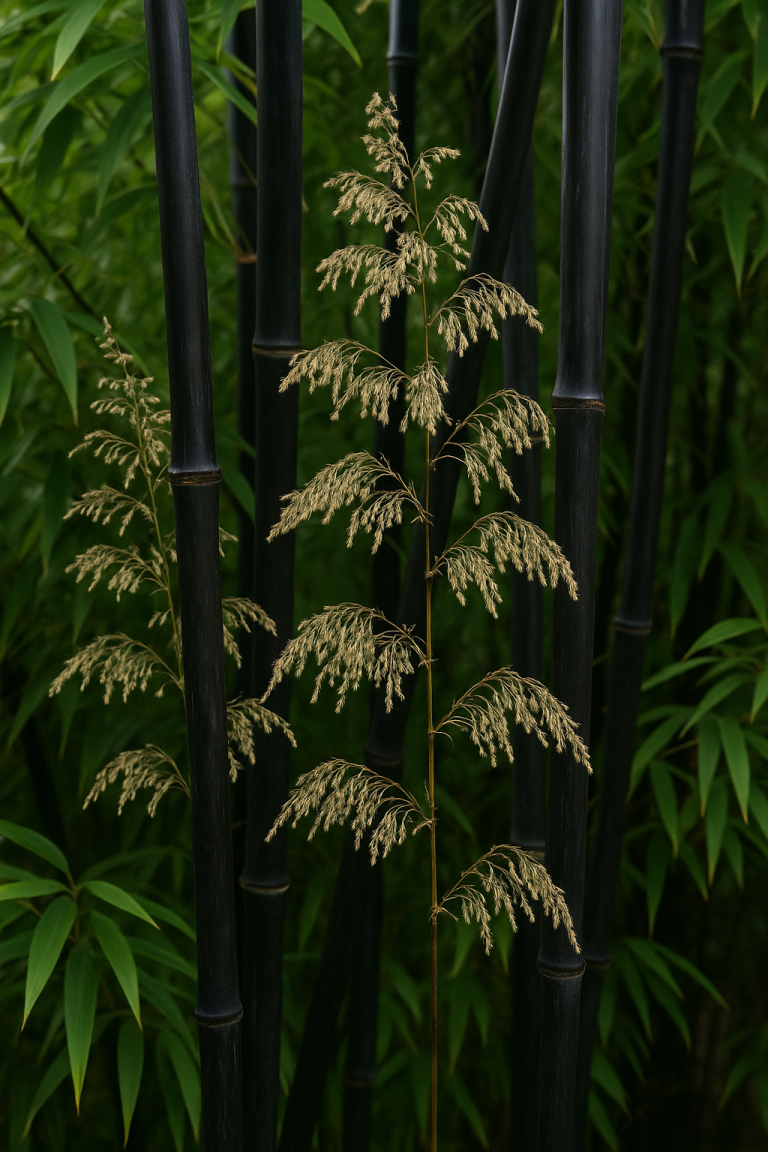
  • Weird feathery-looking flowers at the tops of culms.
  • Thinning foliage, poor growth, and a generally “tired” look.
  • No new culms emerging.
  • In some cases, viable seed may be produced, but germination is unreliable.

Eventually:

  • The bamboo stops sending up new shoots.
  • Leaves fall.
  • Culms dry out and die.
  • The entire grove or clump may collapse.

💡 What Can Gardeners Do?

Here’s what to consider if your black bamboo starts to flower:

✅ Try to Save It

  • Before flowering progresses too far, you can dig up and divide healthy rhizomes and plant them elsewhere.
  • These may survive if they haven’t entered the reproductive phase yet.

🌱 Grow from Seed (If You Get Any)

  • If you’re lucky enough to get seed, you can sow it immediately — it doesn’t store well.
  • The offspring will be genetically diverse, unlike the parent clones.

🔄 Replace It with a New Genetic Line

  • If the plant dies, you may want to:
    • Replace it with a new black bamboo from a different supplier (preferably from a different clone line).
    • Or plant a different species altogether — some people opt for Fargesia species (clumping bamboos) which don’t spread aggressively and have different flowering cycles.

📅 Is Black Bamboo Flowering Now?

There have been reports in recent years (2020s) of black bamboo flowering in parts of the world — particularly from older clone stocks. If you’re seeing videos mentioning it, it could be a sign that a particular line is reaching the end of its cycle.

Here’s what’s happening with black bamboo (Phyllostachys nigra):


📅 Why It’s Flowering Now

  • Mass synchronized flowering: Black bamboo belongs to a group of woody bamboos that flower gregariously every 60–120 years (bambubatu.com). It’s monocarpic — each plant flowers once, then often dies (en.wikipedia.org).
  • Timing: The last worldwide flowering of this clone occurred around 1908, which places the next expected cycle around 2028 (linkedin.com).
  • Currently underway: Observations show flowering has started in various parts of the world since roughly 2019, peaking now and anticipated to continue into 2028 .

🌍 Global Reports

  • UK (Midlands): “flowering spikes… decline of the plant” observed now (inspectaslr.co.uk).
  • Australia & US: Several varieties, including nigra bory, are flowering in places like Victoria and North Plains (reddit.com).
  • Reddit & forums: “Phyllostachys nigra … is currently in a flowering cycle. The last time it was recorded flowering was in the early 1900s.” (reddit.com)

🌱 After Flowering: Die-Off or Regrowth?

  • Common outcome: Most flowering culms die, often failing to produce seeds (sciencedaily.com). In a 2020–2022 Japanese study of P. nigra var. henonis, 80% flowered, virtually no viable seed was produced, and *
    all culms died within 3 years
    * (pmc.ncbi.nlm.nih.gov).
  • Exceptions exist: Some gardeners report that different clonal lines survived post-flowering via vegetative regrowth. For instance: “My black bamboo flowered about 5 years ago. It looked terrible after flowering but survived and now is fine… I even sold some last spring and it’s doing great too.” (palmtalk.org)
  • Regeneration methods:
    • Sexual: Rarely viable; seeds are often infertile or fail to germinate .
    • Asexual: Rhizomes or dwarf ramets may occasionally regenerate into new shoots — success is inconsistent and typically slow (pmc.ncbi.nlm.nih.gov).

🌿 Implications for Gardeners in the UK (like you)

  1. Flowering ongoing now: Expect more blooms and a gradual decline through 2028.
  2. Not a guaranteed die-off: Some clones may recover—others may not.
  3. No viable seeds: Even if you get seeds, they probably won’t germinate.
  4. Regrowth via rhizomes is possible, but uncertain and slow.

✅ What You Can Do

  • Monitor health: Watch for flowering stalks and signs of weakening (yellowing, fewer shoots).
  • Propagation: Try dividing healthy rhizomes before too much decline — this may preserve parts of the clone.
  • Plan ahead: Source new genetic lines (seed-grown or from unaffected clones) to maintain plants post-flowering. Nurseries are starting to sell new-generation black bamboo from seedlings (agaveville.org, reddit.com, bambooweb.info, sciencedaily.com).
  • Replacement options: Consider planting clumping bamboo (e.g., Fargesia) which won’t spread aggressively and has different flowering cycles.

🔍 Quick Recap

AspectCurrent Status
FloweringNow through 2028
Clone die-off riskHigh, but not guaranteed
Seed viabilityVery low
RegenerationPossible via rhizomes, unpredictable

Grow Guide for Marsh Marigold (Caltha palustris)

🌼 Marsh Marigold – Caltha palustris

Family: Ranunculaceae
Common Names: Marsh marigold, Kingcup, Cowflock, May blob
Botanical Synonyms: Caltha palustris var. radicans, Caltha palustris var. palustris


🔬 Botanical Description

Marsh marigold is a robust, herbaceous perennial native to temperate regions of Europe, Asia, and North America. It thrives in wetlands, fens, damp meadows, and shallow water margins.

  • Habit: Clump-forming, with hollow, branching stems
  • Height: Typically 30–60 cm
  • Leaves: Glossy, kidney- or heart-shaped, with scalloped margins
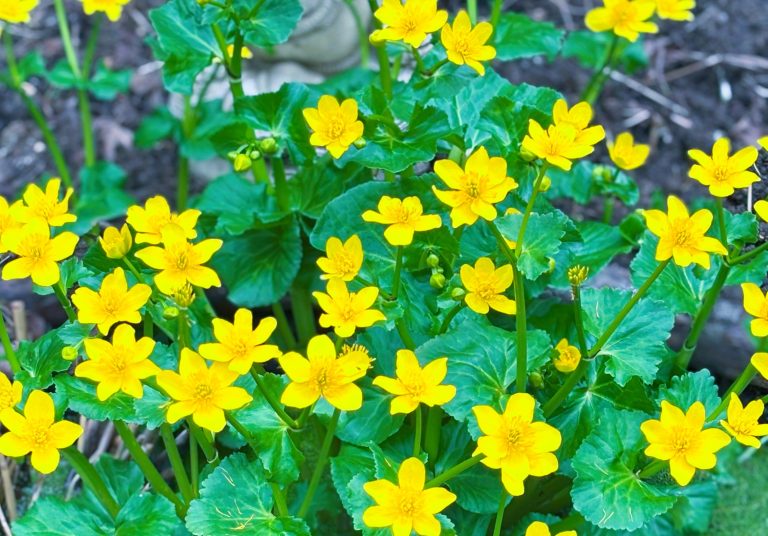
  • Flowers: Bright yellow, buttercup-like, 2.5–5 cm across; not true petals but petaloid sepals
  • Bloom Time: March to May, often with a second flush in autumn
  • Fruit: A cluster of follicles containing black seeds

🌍 Position & Growing Conditions

  • Light: Full sun to part shade
  • Soil: Consistently moist to wet, humus-rich, slightly acidic to neutral (pH 5.5–7)
  • Moisture: Thrives in wet soil or shallow standing water up to 10 cm deep
  • Location: Ideal at the edge of ponds, bog gardens, or stream margins

If your soil is too alkaline and you’re planting in the ground (not in a pond basket), you can:

  • Add ericaceous compost
  • Incorporate leaf mould or pine needle mulch
  • Use sulphur chips or iron sulphate to gradually lower the pH

🌡️ Temperature & Hardiness

  • Hardy in RHS Zones: H7 – very hardy, tolerates temperatures down to -20°C or lower
  • Climate Suitability: Perfect for the UK and other temperate zones
  • Frost Tolerance: Fully frost-hardy; dies back in winter and regrows in spring

🛠️ Care & Maintenance

General Care:

  • Cut back old foliage in late autumn or early spring before new growth appears
  • Remove spent flowers to encourage a second flush (optional)
  • Divide congested clumps every 3–5 years to maintain vigour

Feeding:

  • Not usually required if planted in fertile soil or aquatic planting media
  • Can benefit from a spring mulch of compost or leaf mould around the crown

Pests & Diseases:

  • Generally pest-free
  • Slugs may nibble young shoots, but damage is rarely serious
  • Avoid waterlogged, stagnant conditions to reduce risk of rot

✂️ Pruning

  • When: Late autumn (after flowering) or early spring
  • How: Cut back stems to ground level before new growth emerges
  • Optionally deadhead in spring to prolong bloom

🌱 Propagation

Division:

  • Best method for reliable results
  • When: Spring or autumn
  • How: Lift clumps, tease apart rooted sections with several shoots, and replant immediately

Seed:

  • Sow fresh seeds in autumn or early spring
  • Requires moist conditions and light for germination
  • May take 1–2 years to flower from seed

💧 Planting in a Pond or Bog Garden

In a Pond:

  • Plant in aquatic baskets filled with loam-based compost (e.g., John Innes No. 2)
  • Top with gravel to prevent soil washing out
  • Position at the pond margin (shelf) with crown just above water, up to 10 cm deep
  • Weigh basket with stone if necessary to keep stable

In a Bog Garden:

  • Ensure permanent moisture—ideal with a liner or where water collects naturally
  • Plant directly into the soil, spaced 30–40 cm apart
  • Mulch annually to maintain soil condition

🌸 Garden Uses

  • Wildlife ponds (attracts pollinators and amphibians)
  • Bog gardens and damp meadows
  • Naturalising in shady, wet areas
  • Pairs well with Iris pseudacorus, Primula japonica, and Ligularia species

⚠️ Toxicity

  • All parts are mildly toxic if ingested raw; contains protoanemonin
  • Sap may cause skin irritation in sensitive individuals—wear gloves when handling

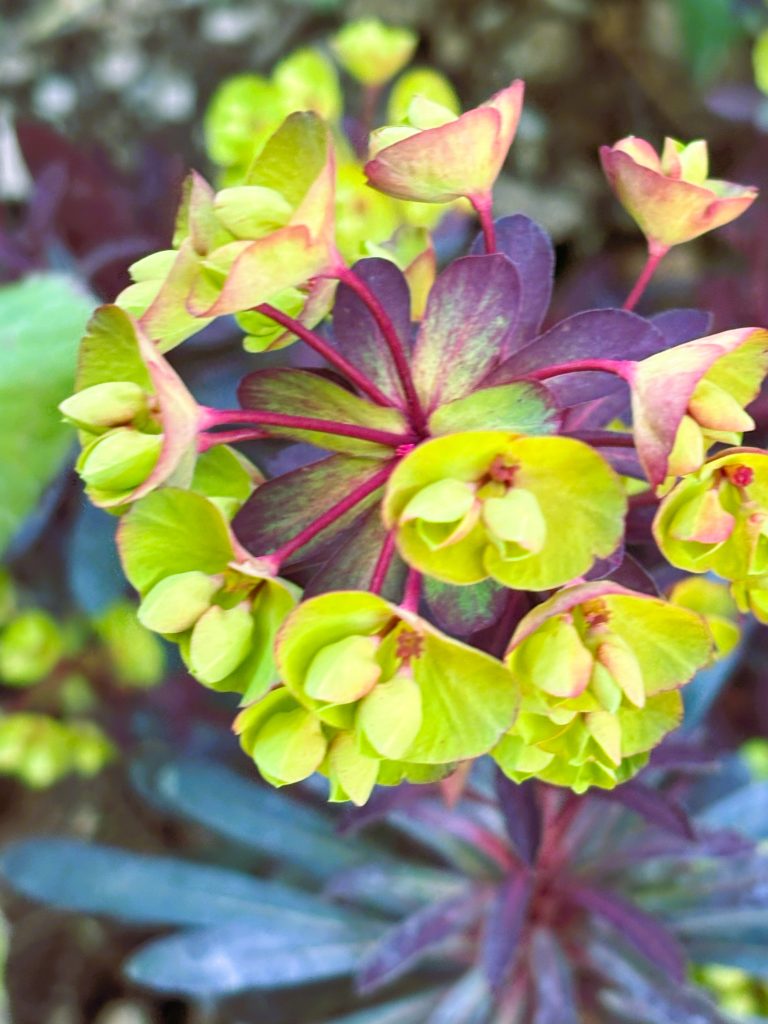
Grow Guide: Euphorbia ‘Miner’s Merlot’

Bold foliage and subtle blooms for year-round interest

🌿 Plant Overview

  • Botanical Name: Euphorbia ‘Miner’s Merlot’
  • Common Name: Miner’s Merlot spurge
  • Family: Euphorbiaceae
  • Type: Evergreen perennial or subshrub
  • Hardiness: RHS H4 (–10°C to –5°C)
  • Height & Spread: 45–60cm tall × 45cm wide
  • Foliage: Deep burgundy-purple with a silvery sheen
  • Flowers: Lime-green bracts with maroon centers, in spring to early summer
  • Scent: Not fragrant

🌱 Planting

  • Best Time to Plant: Spring or early autumn
  • Soil: Well-drained soil is essential
  • Soil Type: Grows well in loam, chalk, or sandy soil
  • Not Suitable For: Heavy clay unless amended with grit and compost for drainage
  • pH: Tolerates neutral to alkaline soils
  • Light Requirements: Full sun to light shade
  • Spacing: Space 40–50cm apart

Tip: Avoid planting in areas prone to winter waterlogging – roots are prone to rot in soggy soils.


🌼 Seasonal Interest

  • Flowering Time: April to June
  • Foliage Interest: Year-round, particularly striking in winter and early spring

🌦️ Care & Maintenance

Watering

  • Drought tolerant once established
  • Water new plants during dry spells until roots are established

Feeding

  • Not heavy feeders
  • Light mulch in spring with compost or fine gravel to keep weeds down

Pruning & Tidying

  • Cut spent flower stems back to the base after flowering
  • Wear gloves when cutting: milky sap can irritate skin and eyes

Pests & Diseases

  • Generally pest- and disease-free
  • May get root rot in poorly drained soils

🌸 Design Tips

  • Great for modern borders, gravel gardens, Mediterranean or dry gardens
  • Combines beautifully with grasses, Alliums, Eryngiums, and Sedums
  • Colour contrast works well against silver-leaved or lime-green foliage plants

🪴 Container Growing

  • Grows well in containers with free-draining compost (e.g., John Innes No. 2 + grit)
  • Choose a sunny, sheltered spot
  • Ensure pots do not sit in water in winter

✂️ Propagation

  • By Cuttings:
    • Take softwood or semi-ripe cuttings in late spring or early summer
    • Allow milky sap to dry before inserting into compost
  • By Division:
    • Divide established clumps in early spring if needed, but not often required

⚠️ Safety Note

  • All parts are toxic if eaten
  • Milky sap can irritate skin and eyes – always wear gloves when handling or pruning

🔁 Troubleshooting

ProblemLikely CauseSolution
Wilting or rotPoor drainage, especially in winterImprove soil or lift and replant in a drier spot
Lack of colourToo much shadeMove to sunnier position
Leggy growthAgeing stems or low lightCut back to base in early spring

🌿 Summary

Euphorbia ‘Miner’s Merlot’ is a tough, architectural plant perfect for modern and drought-tolerant gardens. Its year-round foliage interest and striking spring flowers make it a valuable plant for structure, colour, and texture in sun or light shade.


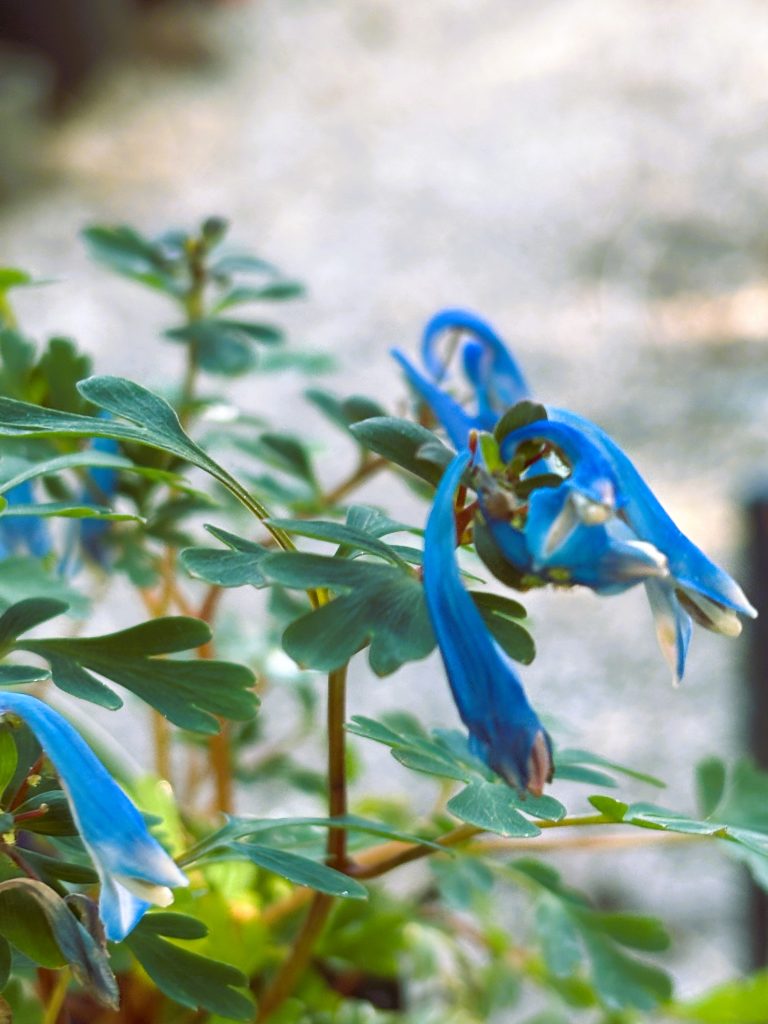
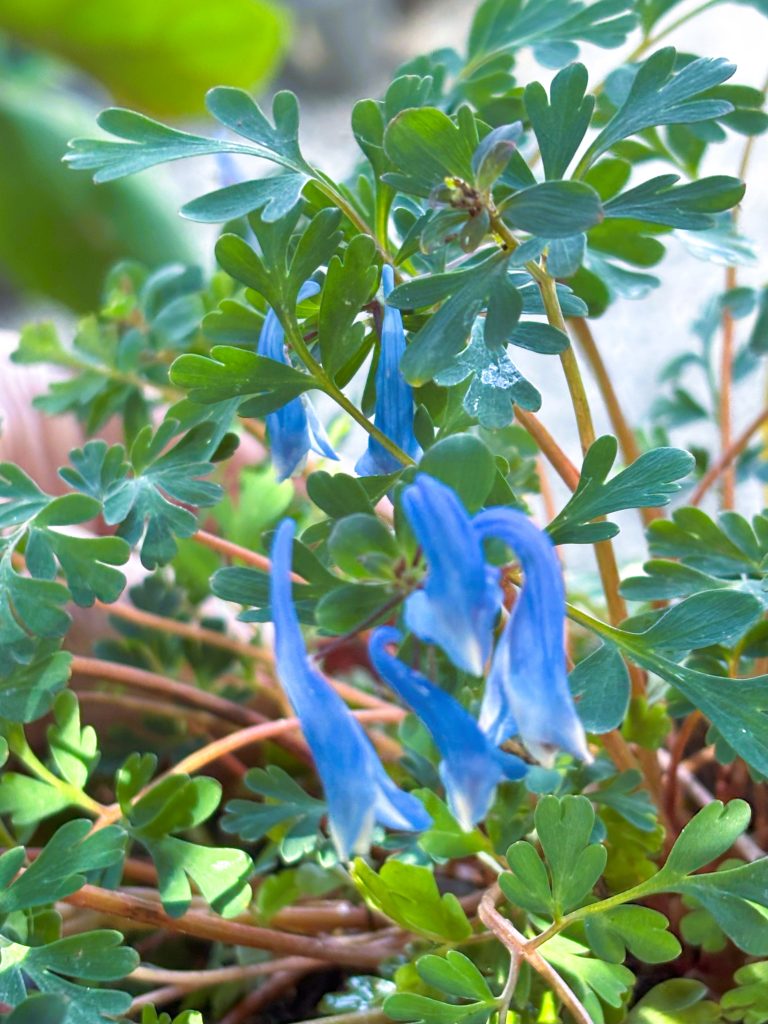
Grow Guide: Corydalis ‘Blue Heron’

Elegant blue blooms for shady borders and woodland gardens

🌿 Plant Overview

  • Botanical Name: Corydalis elata ‘Blue Heron’
  • Common Name: Blue Heron Corydalis
  • Family: Papaveraceae
  • Type: Herbaceous perennial
  • Hardiness: RHS H7 (down to -20°C or lower)
  • Height & Spread: 30–40cm tall × 30cm wide
  • Flowers: Intense cobalt-blue tubular flowers
  • Foliage: Finely divided, ferny, grey-green leaves
  • Scent: Sweetly scented flowers

🌱 Planting

  • Best Time to Plant: Spring or autumn
  • Soil: Moist, humus-rich, well-drained soil
  • Soil Type: Suitable for loam, clay (improved), or sandy soils
  • Not Suitable For: Very dry, shallow chalk or free-draining gravel unless heavily improved with organic matter
  • pH: Neutral to slightly acidic
  • Light Requirements: Partial shade to full shade
  • Spacing: Allow 25–30cm between plants

Tip: Corydalis ‘Blue Heron’ prefers consistently moist, cool soils – work in plenty of leaf mould or compost to improve clay or sandy ground.


🌼 Seasonal Interest

  • Flowering Time: May to September (with breaks in hot weather)
  • Foliage Interest: Deciduous – foliage may disappear in high summer and reappear in autumn

🌦️ Care & Maintenance

Watering

  • Keep soil evenly moist, especially during dry spells.
  • Avoid waterlogging.

Feeding

  • Mulch annually with leaf mould or garden compost in early spring.
  • Optional: feed with a balanced liquid fertiliser in late spring if growth is sluggish.

Pruning & Tidying

  • Deadhead spent flowers to encourage continued blooming.
  • Remove tired foliage in summer if it dies back – fresh leaves may re-sprout later.

Pests & Diseases

  • Generally pest-free
  • May be affected by slugs or snails in spring – protect young growth

🌸 Design Tips

  • Pair with ferns, hostas, Pulmonaria, Brunnera, or Tiarella
  • Great for shady borders, woodland gardens, or underplanting shrubs
  • Perfect under deciduous trees where spring light is strong and summer shade protects the plant

🪴 Container Growing

  • Can be grown in pots with rich, moisture-retentive compost
  • Keep shaded and cool in summer
  • Water regularly to avoid drying out

✂️ Propagation

  • By Division:
    • Divide clumps in spring or early autumn when dormant
    • Replant immediately at the same depth
  • From Seed:
    • Can be grown from fresh seed sown as soon as ripe
    • Germination can be erratic; best for patient growers!

🔁 Troubleshooting

ProblemLikely CauseSolution
Sudden summer dormancyNatural reaction to heat/drynessWater well, leave alone – it may re-emerge
Poor floweringToo much sun or dry soilMove to more shaded, damper spot
Leaves nibbledSlugs or snailsUse barriers or wildlife-friendly pellets

🌿 Summary

Corydalis ‘Blue Heron’ is a quietly stunning addition to the shady garden, valued for its long flowering season and ethereal blue flowers. Once settled in the right spot, it can form slowly spreading clumps that return reliably year after year.

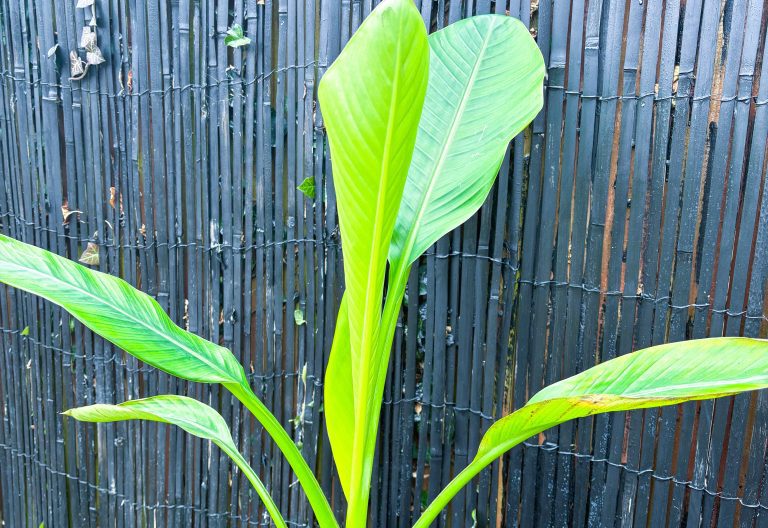
Grow Guide: Ensete ventricosum ‘Hiniba’

Overview

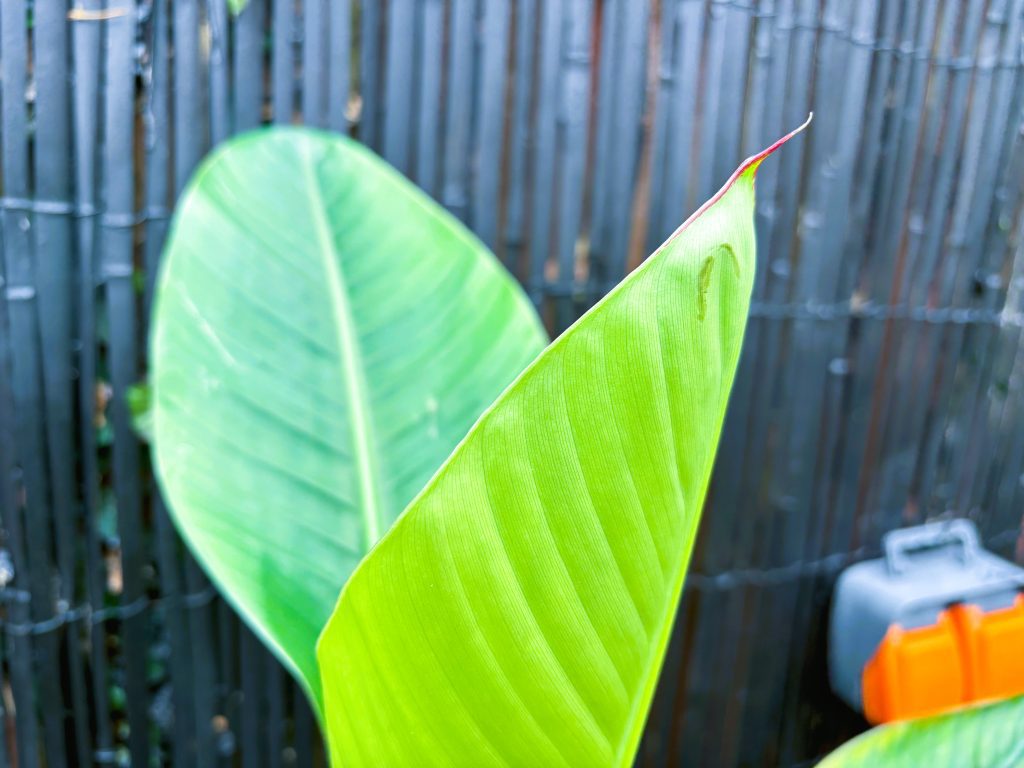
Ensete ventricosum ‘Hiniba’ is a rare and striking cultivar of the Abyssinian banana. It is distinguished by its deep blue-green, waxy leaves and rapid growth, making it a dramatic feature plant. Unlike true bananas (Musa species), Ensete do not produce offsets, so propagation is by seed, adding to their rarity.

RHS Hardiness Rating: H2 (tender – cannot tolerate frost).

Growing Conditions

1. Climate & Hardiness

  • Ideal for USDA zones 9-11; in the UK, best grown as a seasonal plant or overwintered indoors.
  • Not frost-hardy—must be brought indoors or stored dry during winter.
  • Summer Growth Temperature: Prefers 18-30°C (64-86°F).
  • Can tolerate short periods of cooler weather, but growth slows significantly below 10°C (50°F).

2. Soil & Planting

  • Prefers rich, well-draining soil with high organic matter.
  • Suitable for neutral to slightly acidic loam or sandy loam.
  • Avoid heavy clay soils unless well-amended with compost and grit.
  • Does not tolerate waterlogged soil—ensure good drainage.

3. Position

  • Full sun for best growth, but benefits from some afternoon shade in extreme heat.
  • Sheltered position—protect from strong winds to prevent leaf shredding.
  • Ideal for containers in colder climates to allow for easy overwintering.

Feeding & Watering

1. Watering

  • High water demand during summer—keep soil evenly moist but not soggy.
  • Reduce watering in autumn and winter.
  • If overwintering dry, stop watering completely once dormant.

2. Feeding

  • Spring to late summer: Feed weekly with a high-nitrogen fertilizer (e.g., liquid seaweed, chicken manure pellets, or a balanced NPK feed like 10-10-10).
  • Late summer to autumn: Reduce nitrogen and switch to a potash-rich feed (like tomato feed) to strengthen the pseudostem before winter.

Winter Care & Storage

1. Container-Grown Plants

  • Move to a frost-free greenhouse or indoor space before first frost.
  • Keep soil just moist—reduce watering significantly.

2. In-Ground Plants (Overwintering Storage)

  • If too large to move, dig up the plant before frost and allow roots to dry.
  • Store upright in a cool, dry place (e.g., garage or shed) at 5-10°C (41-50°F).
  • Remove all leaves except a short pseudostem stump (about 30cm/12in tall).
  • No watering required—replant in spring when temperatures rise.

Propagation

  • Grown from seed only—seeds require scarification and warm temperatures (25-30°C) to germinate, which can take weeks to months.

Ensete ventricosum ‘Hiniba’ cannot be propagated by cutting in half. Unlike Musa (true bananas), which produce offsets (pups), Ensete species grow from a single central growing point (monocarpic meristem) and do not naturally form side shoots.

Propagation Options for Ensete ventricosum ‘Hiniba’

  1. Seed Propagation (Primary method)
    • Seeds need scarification (light sanding or nicking) and warm temperatures (25-30°C) for germination.
    • Germination can take weeks to months.
  2. Tissue Culture (Commercial method)
    • Some rare cultivars are propagated in labs via micropropagation.

Can You Cut and Regrow an Ensete Plant?

  • If you cut an Ensete in half, it will not regrow like some clumping bananas (Musa).
  • However, experimental techniques involving slicing the base into sections and applying hormones have been tested by expert growers, but this is unreliable and not commonly used.

For home gardeners, seeds are the only viable propagation method for Hiniba.

Pests & Problems

  • Aphids & spider mites may appear, particularly in greenhouses.
  • Leaf scorch occurs if humidity is too low.
  • Root rot is a risk in wet, cold soil.

Summary

Ensete ventricosum ‘Hiniba’ is a rare and spectacular ornamental banana requiring warmth, rich soil, and regular feeding to thrive. It must be overwintered indoors or stored dry in cold climates. Its striking foliage and rapid growth make it a perfect feature plant for a tropical-style garden.

Growing Butia odorata in the UK

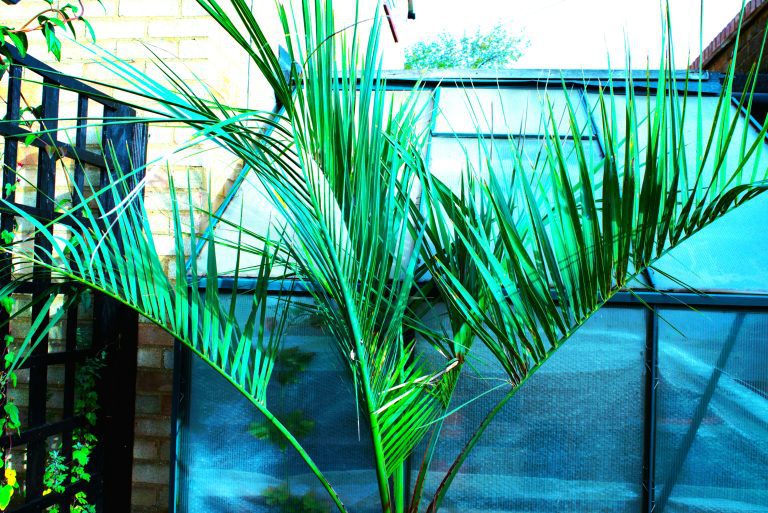
Butia odorata (formerly misidentified as Butia capitata) is one of the hardiest feather palms suitable for UK gardens, particularly in milder regions. Its graceful, arching fronds and edible fruit make it a striking feature in exotic and tropical-style plantings.


Climate & Hardiness

  • Hardy to around -10°C to -12°C, making it one of the most cold-tolerant feather palms.
  • Performs best in southern and coastal areas of the UK, where winters are milder.
  • In colder inland areas, protection is needed during severe frosts.

Planting & Soil Requirements

  • Prefers a well-drained soil, such as sandy or loamy soil with good drainage.
  • Tolerates poor soils but benefits from organic matter for better growth.
  • Likes a sunny, sheltered position, ideally against a south-facing wall or near other plants for wind protection.
  • Tolerates some salt exposure, making it suitable for coastal gardens.

Watering & Feeding

  • Water regularly in the first few years to help establish roots.
  • Once mature, it is drought-tolerant, though it benefits from occasional deep watering in dry spells.
  • Apply a high-potassium feed (such as a palm fertiliser or tomato feed) in spring and summer to encourage healthy growth.

Winter Protection

  • In milder UK areas (e.g., Cornwall, coastal Devon, London), it usually survives unprotected.
  • In colder regions:
    • Mulch around the base with straw or bark to protect roots.
    • If extreme frost is forecast, wrap the crown in horticultural fleece or dry straw.
    • Avoid excessive winter wet, as damp cold is more damaging than frost.

Growth Rate & Appearance

  • Slow-growing but can reach 4–6m tall in the UK over many years.
  • Forms a thick, textured trunk with gracefully arching blue-green fronds.
  • Can be grown in large containers, though growth will be slower.

Pests & Problems

  • Generally pest-free in the UK, though watch for red spider mites in greenhouses.
  • Excess winter wet can cause crown rot, so ensure good drainage.
  • If fronds yellow, it may need extra potassium and magnesium.

Companion Planting

Pairs well with:

  • Trachycarpus fortunei (for a mixed palm effect)
  • Tetrapanax papyrifer (adds a jungle feel)
  • Musa basjoo (hardy banana for contrast)
  • Agave and Yucca species (for a drier, Mediterranean look)

Final Thoughts

Butia odorata is one of the best feather palms for UK gardens, especially if you want a tropical look without the fuss of high maintenance. With a little winter care, it can be a long-lived feature that adds structure and elegance to your landscape.

Are Butia capitata and Butia odorata different plants?

0

The distinction between Butia capitata and Butia odorata is a result of taxonomic revision and improved botanical understanding over time. Both are members of the Arecaceae family and commonly referred to as jelly palms due to their edible fruit.

Historical Background & Taxonomic Changes

Originally, Butia capitata was the widely accepted name for a group of feather-leaved palms native to South America. However, this name was based on a description of a palm from Bahia, Brazil, which turned out to be quite different from the plants commonly cultivated under that name in horticulture.

In more recent taxonomic studies, botanists determined that the species widely grown in gardens—particularly in the UK, Europe, and the United States—is actually a different species, now recognized as Butia odorata. The true Butia capitata is a rarer palm restricted to Brazil, while Butia odorata is native to Uruguay and southern Brazil.

Differences Between Butia capitata and Butia odorata

  1. Geographical Distribution
    • Butia capitata: Found mainly in Bahia, Brazil, in warmer, drier climates.
    • Butia odorata: More widespread in southern Brazil, Uruguay, Paraguay, and northeastern Argentina, in cooler and more humid regions.
  2. Size and Growth Habit
    • Butia capitata: Typically a smaller palm with a more compact trunk.
    • Butia odorata: Tends to be larger and more robust, often with a thicker trunk.
  3. Leaf and Crown Appearance
    • Butia capitata: Has stiffer, more upright leaves with a bluish-green tint.
    • Butia odorata: More graceful, arching fronds that appear greener.
  4. Hardiness and Cultivation
    • Butia odorata is better adapted to temperate climates and is much more commonly grown in gardens, particularly in the UK.
    • Butia capitata is less commonly cultivated outside its native range.

Why the Name Change?

For many years, horticulturalists used Butia capitata to refer to what is now Butia odorata, which led to widespread confusion. Botanists later reviewed the original specimens and found that the plant grown in gardens was actually a separate species, necessitating the recognition of Butia odorata as its own distinct entity.

In practical terms, if you’re growing a “jelly palm” in the UK or elsewhere in Europe, it’s almost certainly Butia odorata, not Butia capitata. However, older plant labels and references may still use Butia capitata, even though it’s incorrect for most cultivated specimens.

Details on growing Butia odorata in the UK

How and When to wake up Colocasias

0

To wake up Colocasias from dormancy in the UK, you need to provide warmth, moisture, and light at the right time.

Best Time to Start in the UK

  • Indoors: March to April (earlier if using a heat mat).
  • Outdoors: Late May to early June, once nights stay above 10°C (50°F).

How to Wake Them Up

  1. Check for Viability
    • If stored dry, inspect tubers for firmness and remove any soft or rotting parts.
  2. Provide Warmth
    • Soil temperature must be at least 15°C (60°F) to break dormancy.
    • A heat mat or propagator set to 18–21°C (65–70°F) speeds up sprouting.
  3. Rehydrate
    • Soak tubers in warm water (25°C/77°F) for a few hours before planting to rehydrate them.
  4. Planting
    • Use a deep pot with moist but well-draining compost.
    • Plant the tuber 1–2 inches deep, with the growing tip facing up.
    • Keep the compost lightly moist but not soggy.
  5. Provide Bright, Indirect Light
    • Place in a warm, bright spot indoors (avoid strong direct sunlight at first).
    • Once shoots appear, increase light levels gradually.
  6. Acclimate Before Moving Outdoors
    • Around mid to late May, start hardening off by gradually exposing them to outdoor conditions over 1–2 weeks.

Colocasias should start growing within 2–6 weeks, depending on warmth and moisture levels.

“The Power of Flowers in a Tropical Garden”

0

Podcast Episode:


“Welcome to Local Gardener, where we explore the art, science, and beauty of gardening. Today, we’re looking at using flowers to enhance the exotic charm of a tropical garden. Whether you’re designing a lush paradise in your backyard or adding tropical flair to a border, flowers play a pivotal role in bringing that rich, colourful, and dynamic look. Let’s take a journey through a rainbow of tropical blooms!”


The Stars of the Show—Big, Bold, and Beautiful

“The first step in creating a tropical garden is selecting flowers that bring bold colours, dramatic shapes, and plenty of presence. Let’s start with some heavy hitters:

Lilies: Whether it’s Asiatic or Oriental hybrids, lilies are showstoppers. Their large, fragrant blooms in shades of white, orange, pink, and even red create a luxurious tropical atmosphere. Oriental lilies like ‘Stargazer’ add intoxicating fragrance, making them ideal near seating areas.

Calla Lilies: Sleek and elegant, their sculptural flowers in shades of white, yellow, and deep purple add sophistication. They thrive in moist, well-drained soil and dappled shade.

Cannas: Nothing says ‘tropical’ like the bold foliage and vibrant flowers of cannas. Their leaves alone can steal the show, and their blooms in reds, oranges, and yellows complement the jungle vibe.

Dahlias: These versatile beauties come in a spectrum of shapes and sizes, from ball-shaped pompoms to spiky cactus types. Plant them in full sun for a dazzling summer display.”


Bright and Cheerful Supporting Players

“Not every flower in your garden has to shout for attention. Sometimes, a cheerful, carefree bloom can bring a sense of movement and spontaneity.

Nasturtiums: With their bold orange and red flowers, these low-maintenance annuals add vibrant colour while attracting pollinators. Plus, their edible blooms are a bonus for salads!

Zinnias and Cosmos: These are summer staples in tropical-style gardens. Zinnias offer hot pinks, oranges, and reds, while cosmos bring a breezy, soft texture with their feathery foliage and pastel blooms.

Rudbeckias and Tithonias (Mexican Sunflowers): These sun-loving flowers are bold, reliable, and perfect for a warm, fiery palette. The tithonia’s large orange blooms add an exotic touch to borders.”


Tropical Showstoppers for Drama and Height

“Tropical gardens love vertical interest and dramatic flair. These tall, bold plants are perfect for adding height and theatre:

Lilies (Lilium regale): Their tall, elegant stems crowned with trumpet-shaped flowers are ideal for adding height. Pair them with bold-leaved tropical plants for maximum impact.

Hollyhocks: Traditional in cottage gardens, their towering spires can surprisingly work in a tropical garden when combined with bright flowers like cannas.

Salvia ‘Amistad’: With its deep purple blooms, this salvia adds a moody sophistication. It’s also a magnet for bees and butterflies.

Spanish Flag (Ipomoea lobata): A striking climber with cascading flowers in shades of red, orange, and yellow, perfect for adding vertical colour to trellises or walls.”


Exotic Favourites for a True Jungle Look

“For a garden to truly evoke the tropics, it needs exotic blooms that make you feel like you’ve stepped into another world.

Hedichium (Ginger Lily): With their fragrant, intricate flowers, ginger lilies are a must-have for a tropical garden.

Tigridias (Mexican Shell Flower): These unique, spotted blooms only last a day, but their exotic beauty makes them well worth growing.

Fuchsias: Their pendant blooms look like tiny ballerinas, perfect for hanging baskets or shady spots.”


Groundcovers and Fillers for Colour All Season

“Tropical gardens aren’t just about towering plants—they also need lush groundcovers and fillers to complete the look.

Busy Lizzies (Impatiens): For shaded areas, these cheerful flowers provide continuous colour in pinks, reds, and whites.

Begonias: Whether you go for tuberous begonias or the waxy-leaved bedding types, begonias thrive in dappled light and add a burst of long-lasting colour.”


Long-Blooming Perennials for Tropical Flair

“Finally, let’s talk about reliable perennials that come back year after year. These flowers give your garden structure and continuity.

Crocosmias: Their fiery orange-red flowers and arching stems scream tropical. They’re also loved by pollinators.

Alstroemeria: These long-lasting blooms in a variety of colours are perfect for borders and cut flowers.

Echinaceas: The spiky centres and bright petals of echinaceas add a prairie-like texture that works beautifully with bold tropicals.

Ligularias: Ideal for damp areas, these plants bring dramatic foliage and bold yellow flowers that light up the shade.”


The Finishing Touch—Climbers and Scented Beauties

“Every tropical garden needs climbers and a hint of fragrance to elevate the sensory experience.

Lonicera ‘Dropmore Scarlet’ (Honeysuckle): This vibrant, coral-red honeysuckle is perfect for adding vertical interest and attracting pollinators.

Heleniums: Late bloomers like heleniums ensure your garden stays colourful into autumn, with their warm tones blending seamlessly with tropical flowers.”


“And there you have it—a guide to using flowers in your tropical garden. Whether you’re just starting out or adding the finishing touches, these plants will help you create a paradise bursting with colour, texture, and life. Join me next time on Local Gardener for more tips and inspiration. Until then, happy gardening!”

The Clever Mechanics of the Venus Flytrap: A Plant That Can Count

The Venus flytrap (Dionaea muscipula) is one of the most fascinating plants in the natural world. Found natively in the nutrient-poor soils of the Carolinas in the United States, this carnivorous plant has evolved a cunning strategy to supplement its diet: catching and digesting live prey, usually insects or arachnids. But what makes this plant truly remarkable is its ability to “count” before taking action.

How Does the Venus Flytrap Count?

The Venus flytrap’s leaves are modified into trap-like structures lined with sensitive trigger hairs. When an unsuspecting insect lands on the trap, it may brush against one of these hairs. A single touch isn’t enough to close the trap. Instead, the plant “remembers” this first touch for about 20 seconds. If a second touch occurs within that time, the trap snaps shut, sealing its prey inside.

This ability to “count” helps the Venus flytrap conserve energy. Closing its trap is a costly process, and doing so unnecessarily—for example, in response to falling debris or raindrops—would waste precious resources. The two-touch system ensures the plant only reacts when there’s a high likelihood of catching a meal.

What Happens Next?

Once the trap closes, it doesn’t immediately seal completely. Instead, it forms a loose cage-like structure that allows small, non-prey objects to escape. If the trapped object continues to move inside the trap, additional triggers stimulate the plant to seal the trap entirely. This creates an airtight chamber where digestive enzymes break down the prey over the next 5–12 days, absorbing nutrients like nitrogen and phosphorus that the plant can’t obtain from the soil.

The Science Behind the Trap

The counting mechanism is made possible by electrical signals, much like the action potentials in animal nerve cells. When a trigger hair is touched, an electrical charge is generated and stored in the leaf tissue. A second charge within 20 seconds activates specialized cells at the edges of the trap, causing them to change shape and snap the trap shut.

Why Is This Important?

The Venus flytrap’s ability to count highlights the sophisticated adaptations plants can develop to survive in challenging environments. Despite lacking brains or nervous systems, plants like the Venus flytrap demonstrate behaviors that seem almost intentional, blurring the line between plant and animal-like abilities.

Caring for a Venus Flytrap

If you’re tempted to grow this fascinating plant, it’s worth noting that Venus flytraps require specific conditions to thrive. They need:

  • Bright light: Full sun or a grow light for at least 12 hours a day.
  • Moisture: Distilled water or rainwater, as tap water can harm them.
  • Nutrient-poor soil: A mix of sphagnum moss and sand or perlite.
  • Dormancy: During winter, they need a rest period with cooler temperatures.

Avoid triggering the traps unnecessarily, as this can exhaust the plant. Let nature do the work, or offer an occasional insect if you’re growing one indoors.

Feeding a Venus flytrap flies or other small insects is not always necessary, but it can be beneficial depending on where and how the plant is grown. Here’s what you need to know:

Do Venus Flytraps Need Flies to Survive?

In their natural habitat, Venus flytraps rely on insects to supplement the nutrients they can’t get from their nutrient-poor soil. If you’re growing one indoors or in a controlled environment, feeding insects can help it thrive, but it isn’t essential if the plant is otherwise healthy and gets enough sunlight.

When to Feed It

If your Venus flytrap isn’t catching its own prey (e.g., indoors or in a greenhouse):

  • Feed it sparingly: Offer a small insect (like a fly, spider, or cricket) every 1–2 weeks during its active growing season (spring through autumn).
  • Avoid overfeeding: Only one or two traps need to be fed at a time. Feeding too often can stress the plant.

What to Feed It

  • Small, live insects are ideal, as movement triggers the trap to close properly.
  • If live insects aren’t available, you can use dried ones (like freeze-dried bloodworms), but you’ll need to rehydrate them and gently stimulate the trap to mimic movement.
  • Never feed it human food like meat, cheese, or fruit—this can rot the trap and harm the plant.

When Not to Feed It

  • During dormancy: Venus flytraps go dormant in winter, during which they don’t need to eat.
  • If they’re outdoors: Plants grown outside usually catch enough prey on their own.
  • If traps are closed often: Avoid feeding it if the traps seem stressed or inactive from frequent triggering.

Each trap on a Venus flytrap can typically close 3 to 5 times during its lifespan before it stops functioning and dies off. After this, the plant produces new traps to replace the old ones.

Here’s what happens over the life of a trap:

1. Initial Closures

  • The first closures are the most effective.
  • Traps can open again after catching debris or failing to secure prey.

2. Digestive Closures

  • If the trap successfully captures prey, it seals completely and spends 5–12 days digesting the meal.
  • After digestion, the trap reopens, revealing the indigestible remains of the insect.

3. Decline

  • With each closure, the trap becomes less responsive and may eventually turn black and die.

Why Limited Closures?

Closing and reopening is energy-intensive. Since the Venus flytrap lives in nutrient-poor soil, it must conserve resources by limiting how often each trap can close. This efficiency ensures the plant focuses on catching prey rather than reacting to non-nutritive triggers like raindrops.

Care Tip

Avoid manually triggering the traps unnecessarily. This exhausts the plant’s energy and reduces the lifespan of each trap. Let the traps close naturally when catching prey or during feeding.

Feeding a Venus flytrap can be fascinating, but in many cases, letting nature take its course is the best approach. If you provide the right growing conditions—plenty of light, proper soil, and water—it will likely thrive without needing your help in catching its meals!

Conclusion

The Venus flytrap is a marvel of evolution, combining mechanical precision with chemical signaling to catch its prey. Its ability to “count” shows that intelligence in the natural world doesn’t always require a brain—it’s all about adaptation and survival. The next time you encounter a Venus flytrap, remember that it’s not just a plant; it’s a master of strategy, efficiency, and resourcefulness.